I first tried these several years ago, but without the sticks, so they were just cake balls. Then along came Bakerella, (I love her, btw) and I'm not sure if she added the stick or what, but she pretty much made them famous. She even went on Martha Stewart and made them.
I am a show off, what can I say? I wanted to make something impressive to take to our church's Trunk or Treat, so I decided on these.
To make them, you'll need:
1 cake, baked and cooled - 9 x 13 is perfect
1 tub of frosting (or an equivalent amount of homemade)
Almond bark or candy coating discs (I used orange ones from Wilton's and chocolate Almond Bark)
Lollipop sticks
Styrofoam
Start by crumbling your cake into a big bowl, like so:

Then add your frosting and mix it up well. Note: You don't have to have a whole cake. This would be a perfect way to use up cake leftovers. Just add frosting a little bit at a time to get it to the right consistency.
Then roll them into balls, whatever size you want is fine. Mine were probably about 1 1/2" in diameter and I liked that size. Place them on waxed paper and pop them into the freezer for an hour or two. At first, I put them in the fridge, but I found that they softened up too much, too quickly. So a trip to the freezer made them all better.

Then the fun part! Melt your chocolate however your package tells you to (I used the microwave) and stick a stick in them. Dip it in the chocolate and swirl it around to make sure you get it good and covered. Let the excess drip off and then stand them up in the styrofoam to let them harden.
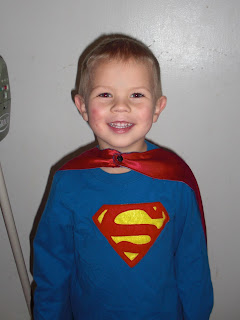
The final thing I did was to put some of the coating in a zip lock bag and snip off a tiny bit of the corner and pipe some swirls on the top. Oooh, la, la! They are fancy now! I actually had wanted to make jack-o-lantern faces out of fondant, but 1) I only bought one package of orange coating and it didn't make that many and 2) I had sewn Superman's belt, Alice's apron and run six miles that day and was ready to just be done already. So the swirls looked great and were fast and easy.
Voila! Cake pops!
 My six year old is going to a birthday party tonight and she needs a gift. My plan was to go to Walmart today and get one for her to take, but then I went into my laundry room and saw the three pairs of jeans that have been sitting there for two years, just waiting for me to make something with them. An idea to save me $20 was forming...
 I chose some pretty lightweight courderoy to make the skirt out of. I used the whole width of it for the first tier, so it measures 19 x 7, cut on the fold. Then I used two pieces of 24 x 9 for the bottom layer. In retrospect, it would've looked better with a fuller bottom layer. I should've done the whole width of the fabric for each of the two pieces, but with the same 9 inches in length that I did use.
 Next, I needed to gather the top edge of the bottom layer, so I turned up the tension on my machine and used the widest stitch I could to baste it. Then I was able to pull on the bobbin string and adjust it to the width I needed it.

 Use lots of pins to attach the skirt to the jeans and be careful to make it level all the way across. I ended up picking some of it out and straightening it out. Oh, how my disdain for pinning comes back to bite me sometimes.